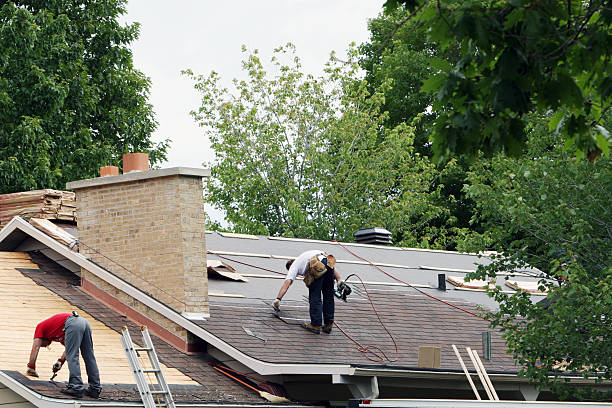
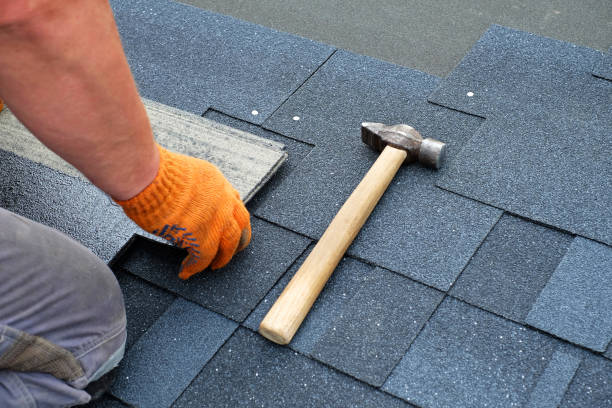
Installing a metal roof is an excellent investment due to its durability, energy efficiency, and long lifespan. This guide will walk you through the essential steps to ensure a successful metal roofing installation. Whether you’re a professional roofer or a DIY enthusiast, following these steps can help achieve optimal results.
Step 1: Assess and Prepare the Roof Surface
- Inspect for Damage: Before installation begins, inspect the roof deck for damage or rot. Repair any weak spots to ensure structural integrity.
- Clean the Surface: Remove debris, nails, or old roofing materials that could interfere with installation.
- Install Underlayment: Lay down a moisture barrier (e.g., synthetic underlayment or felt paper) to protect the roof deck from water infiltration.
Step 2: Gather Necessary Tools and Materials
Having the right tools ensures efficiency and safety during installation. Essential items include:
– Metal roofing panels (pre-cut if possible)
– Screws with rubber washers (to prevent leaks)
– Measuring tape and chalk line
– Tin snips or metal shears for cutting panels
– Power drill with appropriate bits
– Safety gear like gloves, goggles, and non-slip boots
Step 3: Measure Your Roof Accurately
| Measurement Task | Tools Needed | Outcome |
| Measure Roof Length | Measuring Tape | Determines panel length |
| Calculate Roof Pitch | Pitch Gauge / Level | Ensures panel fit & alignment |
| Total Square Footage | Calculator | Helps estimate material needs |
Record these measurements carefully before purchasing materials.
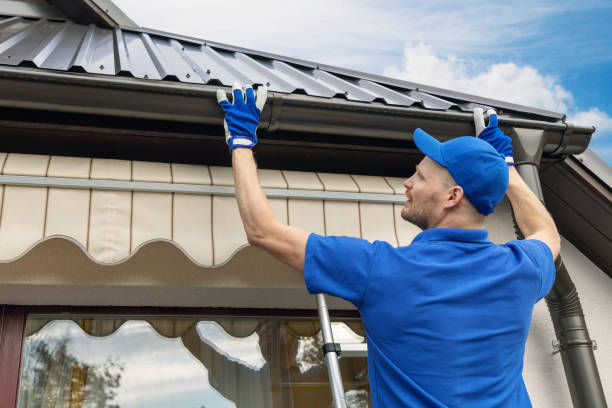
Step 4: Install Edge Flashing and Eave Trim
Edge flashing prevents water from seeping under your panels, while eave trim adds aesthetic appeal at roof edges. Secure these components using screws spaced every 12 inches.
Step 5: Lay Out Panels Strategically
Start laying panels at the edge of the roof opposite prevailing wind direction for better resistance against wind uplift. Use a chalk line to ensure straight alignment during installation.
Step 6: Attach Panels Securely
When placing each panel: 1. Overlap edges according to manufacturer specifications (typically one corrugation or ridge). 2. Secure screws into each ridge rather than valleys; this minimizes potential leaks. 3. Keep screws aligned in straight rows for professional appearance.
Step 7: Add Ridge Caps
Ridge caps provide protection at peaks where two slopes meet: – Place foam closures beneath ridge caps for added sealing. – Use screws along both sides of ridges.
Step 8: Seal Gaps Properly
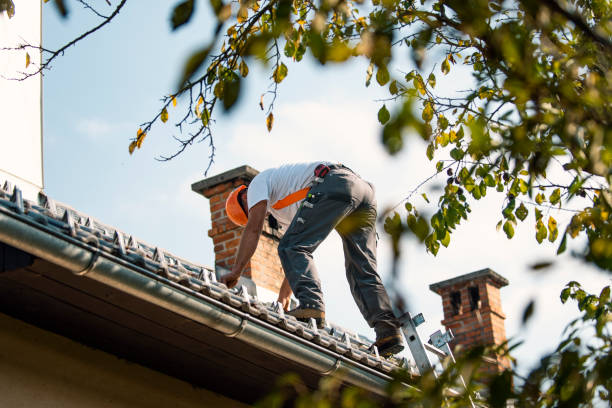
Use sealant or foam closures around vents, chimneys, and skylights to create a watertight seal across interruptions in roof continuity.
Step 9: Check Installation Quality
Inspect your work once all panels are secured: – Ensure there are no loose screws. – Confirm all overlaps are consistent across rows. – Verify that flashing is intact without gaps.
Step 10: Maintain Your New Metal Roof
To extend its lifespan: 1. Clean debris from panels periodically. 2. Inspect for loose fasteners after storms or high winds. 3. Reapply protective coatings as recommended by manufacturers.
Installing metal roofing requires careful planning but results in long-term benefits like weather resistance and reduced energy costs when done correctly. Following this guide ensures your project is completed safely and efficiently while maximizing performance longevity of your new roof system.
Accurate Roof Measurements with a Trusted St Michael MN Roofing Company
Accurate roof measurements are a vital component of any successful roofing project. Whether it’s for repairs, a replacement, or a new installation, precise calculations ensure proper material estimates, minimize waste, and help maintain your budget. Below, we break down the key aspects of understanding and calculating roof measurements.
The Importance of Accurate Roof Measurements with a Roofing Contractor Saint Michael MN
- Material Estimation: Misjudging the size of your roof can lead to ordering too much or too little material. Both scenarios result in unnecessary costs.
- Labor Costs: Accurate measurements allow contractors to calculate labor requirements more effectively.
- Structural Integrity: Precise sizing ensures materials are cut and fitted correctly, maintaining the integrity and durability of your roof.
- Project Timeline: Proper planning based on correct dimensions prevents delays caused by reordering supplies or making adjustments on-site.
Understanding Roofing Services St Michael MN: Basics in Roof Measurement
Johnson Exteriors
https://www.johnsonexteriors.org
(763) 355 4458
- The pitch refers to how steep your roof is and is usually expressed as a ratio (e.g., 4/12). This means the roof rises 4 inches for every 12 horizontal inches.
- Knowing your pitch helps determine the actual surface area of your roof.
- While roofs may look flat from above, their surface area depends on their slope and shape. It’s measured in square footage.
- Roofers often use “squares” for simplicity. One square represents 100 square feet.
Tools You’ll Need
- Tape measure or laser distance measurer
- Ladder
- Safety harness
- Calculator
- Notepad or roofing measurement app
How to Measure Your Roof Step-by-Step
- Place a level horizontally on your roof with one end touching its surface.
- Measure the vertical rise (in inches) over 12 inches of horizontal run using a ruler.
- Common shapes include gable, hip, mansard, gambrel, and flat roofs.
- Each shape requires slightly different measurement techniques due to its design and surface area.
- For simple roofs like gables, measure length and width of each plane.
- For complex roofs with multiple sections or angles, measure each section individually before summing them up.
- Multiply width × length for flat planes.
- Adjust based on pitch using this formula:
Adjusted Area = Length × Width × Pitch Factor - Convert Surface Area Into Roofing Squares: Divide total square footage by 100 to determine how many squares you’ll need.
| Pitch Ratio | Pitch Factor |
| 3/12 | 1.03 |
| 6/12 | 1.12 |
| 9/12 | 1.25 |
| 12/12 | 1.41 |
Tips for Accurate Measurements
- Always double-check dimensions before finalizing numbers.
- Use proper safety gear when working at heights.
- Consider hiring a professional if your roof has complex shapes or extreme slopes.
Understanding how to properly measure your roof minimizes errors during material procurement and installation while keeping costs manageable throughout the project lifecycle.
Understanding Roof Measurements: A Crucial Step for Accurate Roofing Projects
Accurate roof measurements are critical to ensuring the success of any roofing project. Whether you are planning a new roof installation, a replacement, or repairs, understanding how to measure your roof properly can save you time, minimize waste, and help you avoid costly mistakes. Below is a guide to understanding roof measurements and the tools and techniques you’ll need for accuracy.
Why Accurate Roof Measurements Are Important
- Material Estimation
Proper measurements ensure you purchase the right amount of materials such as shingles, metal panels, underlayment, or flashing, avoiding over-ordering or under-ordering. - Cost Management
Accurate measurements help in creating an accurate budget since costs are often based on square footage or roofing square calculations (1 square = 100 square feet). - Project Efficiency
Having correct measurements allows contractors to work without unnecessary delays caused by material shortages or adjustments during installation. - Compliance with Building Codes
Certain areas require compliance with specific building codes that rely on precise roof dimensions.
Tools Needed for Measuring Your Roof
- Measuring tape (preferably 25 feet or more)
- Ladder rated for your weight and height requirements
- A pitch gauge to determine the slope of your roof
- Calculator for converting measurements into roofing squares or other units
- Safety harness and non-slip shoes if accessing the roof directly
Steps to Measure Your Roof Accurately
- Determine Roof Pitch
Use a pitch gauge from inside the attic or place it on the slope externally using a ladder to find out your roof’s pitch ratio (e.g., 4/12 means 4 inches of vertical rise for every 12 inches of horizontal run). The pitch is essential for calculating surface area accurately. - Measure Roof Dimensions from Ground Level (if possible)
Measure each side of the house’s footprint by walking around with a measuring tape or laser distance meter if ground-level measurement is feasible. - Access Roof Safely
Using safety gear such as harnesses and stable ladders, climb onto the rooftop if direct measurement is necessary. Always secure yourself properly before proceeding. - Measure Each Section’s Length and Width
For roofs with multiple slopes or sections, break them down into smaller rectangles or triangles. Record lengths and widths individually. - Account for Overhangs
Include overhangs in your total measurement by extending your tape measure past the edge where eaves extend beyond walls. - Calculate Total Surface Area
Multiply length by width for each section to get its area in square feet; then sum all sections together. - Adjust Measurements Based on Pitch/Slope
Multiply total flat surface area by an adjustment factor based on pitch:
| Pitch Ratio | Slope Factor |
| 3/12 | 1.03 |
| 6/12 | 1.12 |
| 9/12 | 1.25 |
| 12/12 | 1.41 |
- Include Waste Factor
Add about 10% extra material in case of cuts, errors, or irregular shapes during installation.
Common Mistakes When Measuring Roofs
- Skipping slope adjustments can result in significant material shortages.
- Forgetting overhangs may leave parts of the structure exposed during installation.
- Neglecting safety precautions while working on steep roofs increases risk.
- Ignoring intricate areas like dormers can underestimate material needs.
Understanding how to measure a roof not only simplifies project planning but also ensures better communication between homeowners and contractors regarding scope and costs involved in roofing projects.
Choosing the Right Metal Panel Type for Your Roofing Needs
Selecting the right type of metal panel for your roofing project is a critical step that can determine the longevity, durability, and aesthetic appeal of your roof. With several options available in terms of material, style, and finish, understanding the differences between metal panels can help you make an informed decision.
Common Types of Metal Panels
- Description: These panels have raised seams that interlock to create a smooth appearance.
- Best Suited For: Residential and commercial properties seeking a modern look.
- Excellent water resistance due to raised seams.
- Clean, contemporary aesthetic.
- Compatible with solar panel installations.
- Description: Recognizable by their wavy design, these panels offer a classic industrial or rustic appearance.
- Best Suited For: Barns, sheds, and homes with a rustic design theme.
- Durable and lightweight material.
- Budget-friendly option for larger areas.
- Easy installation process.
- Description: Characterized by wide flat sections between ribs or ridges running along the panel’s length.
- Best Suited For: Agricultural buildings or modern architectural designs.
- Strong structural integrity.
- Provides excellent coverage at lower costs.
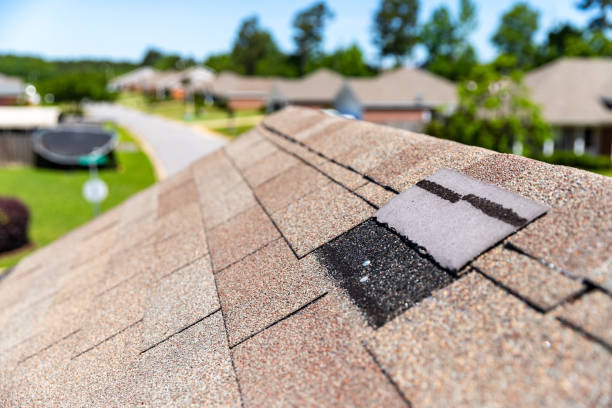
- Description: Mimics traditional asphalt shingles but comes in durable metal form.
- Best Suited For: Homeowners desiring a traditional look with enhanced durability.
- Higher lifespan compared to asphalt shingles.
- Multiple color and texture options available.
- Description: Resembles clay or concrete tiles but is made of metal to reduce weight while maintaining visual appeal.
- Best Suited For: Mediterranean or Spanish-style homes.
- Advantages:
- Lower maintenance than traditional tiles.
- Lightweight structure reduces stress on the roof deck.
Key Factors To Consider When Choosing Metal Panels
| Factor | Considerations |
| Material Type | Aluminum (lightweight), steel (durable), zinc/copper (premium finishes). |
| Climate | Resistance to snow loads, high winds, and corrosion in coastal regions |
| Aesthetic Preferences | Color options and styles that complement your home’s architecture |
| Budget | Balancing upfront costs with long-term savings due to extended durability |
| Longevity | Expected lifespan compared to other materials like asphalt shingles |
Benefits of Choosing the Right Panel Type
- Enhanced curb appeal tailored to your home’s design.
- Greater energy efficiency if reflective coatings are selected.
- Long-term cost savings due to reduced maintenance needs and extended durability.
By carefully analyzing both functional requirements and aesthetic preferences, you can ensure you select the most suitable metal panel type for your unique roofing project needs.
How to Plan and Manage Your Project Budget for a Roofing Installation
Effective budget planning is essential to ensure a successful roofing installation project. Without a clear financial strategy, unexpected expenses can arise, potentially derailing the project. Below is a guide to help you plan and manage your roofing installation budget effectively while avoiding common pitfalls.
Assess Your Roofing Needs
- Roof Type: Are you installing shingles, metal panels, or tiles? Different materials have varying costs.
- Roof Size: Larger roofs require more materials and labor, increasing overall expenses.
- Structural Issues: Is there any existing damage that requires repair before installation? For example, water damage or rot could add unexpected costs.
- Customization: Will you include features like skylights, ventilation systems, or insulation? Custom additions can significantly impact your budget.
By clearly defining these details upfront, you’ll have an accurate understanding of the required resources for your project.
Create a Detailed Budget Plan
- List All Potential Costs
Break down expenses into categories such as materials, labor, permits, disposal fees (for old roofing), and equipment rentals (if necessary). - Asphalt Shingles: $100–$200 per square (10’x10’)
- Metal Panels: $150–$350 per square
- Clay Tiles: $300–$500 per square
Compare prices from multiple suppliers to get the best value without compromising quality.
- Labor Costs
Labor costs typically range from $1.50–$3 per square foot depending on location and the contractor’s experience level. - Include Contingency Funds
It’s wise to allocate 10–15% extra in case of unforeseen issues during the installation process.
| Expense Category | Estimated Cost Range | Notes |
| Materials | $100–$500/sq | Depends on material type |
| Labor | $1.50–$3/sq ft | Regional variations apply |
| Permits | $100–$500+ | Based on local regulations |
| Disposal Fees | $50–$150 | Dependent on roof size |
| Contingency | 10–15% of total | For unexpected expenses |
Work with Experienced Contractors
- Request written estimates for transparency.
- Check references and reviews.
- Ensure they are licensed and insured in your area.
Track Expenses During Project Execution
- Review receipts regularly to verify material costs align with estimates.
- Monitor labor hours if charged hourly.
- Address unexpected issues immediately to prevent escalating expenses.
Evaluate Cost-Saving Opportunities
- Purchase materials in bulk when possible.
- Schedule work during off-season periods when contractors may offer discounts.
- Opt for energy-efficient materials that qualify for tax credits or rebates.
Careful planning and proactive expense management will help reduce financial stress throughout your roofing project while ensuring high-quality results tailored to your needs.
Top Reasons to Inspect and Finalize Your Roof After Installation
Proper inspection and finalization of your roof after installation are critical steps to ensure the long-term durability, safety, and functionality of your roofing system. Skipping these steps could lead to costly repairs, safety hazards, or even a shortened lifespan for your roof. Below are key reasons why this phase is essential and practical tips for completing it effectively.
1. Ensure Proper Installation
Even with experienced contractors, mistakes can happen during the installation process. A post-installation inspection allows you to identify:
– Missing or improperly secured shingles or panels
– Gaps in flashing around chimneys, vents, or skylights
– Loose fasteners or hardware that could compromise the roof’s integrity
This step ensures all components are securely in place and meet manufacturer guidelines as well as local building codes.
2. Identify Damage Early
During installation, materials may become damaged due to handling errors or environmental factors like unexpected weather. Inspection helps detect:
– Cracks in tiles or metal panels
– Tears in underlayment materials
– Signs of water intrusion or leaks
By addressing these issues promptly, you prevent small problems from escalating into major repairs.
3. Verify Warranty Compliance
Most roofing materials come with manufacturer warranties that require proper installation and maintenance. A thorough inspection provides documentation that:
– The roof was installed according to warranty requirements
– The correct materials were used without substitutions
This ensures your warranty remains valid should future issues arise.
4. Prevent Water Damage Risks
Water intrusion is one of the most common causes of roofing failure. Inspecting your roof post-installation allows you to confirm:
– Proper drainage systems are in place (gutters and downspouts)
– Seals around flashings are watertight
– No standing water is pooling on the surface
Taking these measures protects your home from potential water damage and mold growth.
5. Confirm Energy Efficiency Performance
Modern roofs often integrate energy-efficient features such as reflective coatings or proper insulation layers. Inspection helps verify that these elements were installed correctly so you can maximize energy savings on heating and cooling costs.
Steps for Post-Installation Roof Inspection
- Visual Walkthrough: Start with a ground-level visual examination of the entire roof for any obvious issues like dents, missing sections, or uneven surfaces.
- Check Flashing Areas: Look specifically at transitions where flashing was installed (e.g., chimneys, skylights) for gaps or misaligned pieces.
- Inspect Gutters & Drainage: Ensure gutters are clear of debris and properly connected to facilitate water flow.
- Test Seams & Fasteners: If it’s safe to access the roof directly, check seams between panels/tiles and test fasteners by ensuring they’re secure.
- Professional Assessment (optional): For complex installations or peace of mind, consider hiring a certified inspector who specializes in post-installation assessments.
Benefits of Post-Roofing Inspections
| Benefit | Description | Outcome |
| Extended Lifespan | Addressing potential issues early prevents premature aging | Long-lasting performance |
| Cost Savings | Resolving minor defects now avoids expensive repairs later | Reduced financial burden |
| Safety Assurance | Identifies structural risks like loose fasteners | Ensures safety for occupants |
| Peace of Mind | Certainty that your investment meets quality standards | Confidence in workmanship |
By taking time to thoroughly inspect and finalize your newly installed roof, you protect both the structural integrity of your home and the value of your investment over the years ahead.
- Comprehensive 10-Step Guide to Installing Metal Roofing by a St Michael MN Roofer
- The Importance of Professional Roofing Services St Michael MN After Severe Storms
- The Step Process to Your Roof Replacement with a Trusted Roofing Contractor Saint Michael MN
- Key Warning Indicators That Mean It’s Time to Call a St Michael MN Roofing Company for a Full Roof Replacement
- Key Warning Signs You Need a Roof Replacement from a St Michael MN Roofer
- Comprehensive Guide by St Michael MN Roofing Company: How to Install Metal Roofing in 8 Steps
- Comprehensive Guide for Post-Hail and Wind Damage Repair by a St Michael MN Roofer
- Tips from a St Michael MN Roofer on Identifying Common Signs of Roof Damage